So you’re considering starting a YouTube channel? Well, you’re in the right place.
I’ve helped Ali Abdaal grow his YouTube channel to more than 5m subscribers as his Head of YouTube, and as a team we’ve helped more than 5,000 YouTubers start and grow their own channels too.
We live and breathe YouTube, and this is our comprehensive guide on how to get started on YouTube.
If you’re looking for an ultimate guide on absolutely every single thing you could need to know, then take a look at this page here.
How to Set Up Your YouTube Channel
First things first, let’s get your channel set up. It’s super easy and once you have that, you’ll feel a sense of momentum.
You’ll need a Google account, if you have one already then just use that, but if not you’ll need to create a new one.
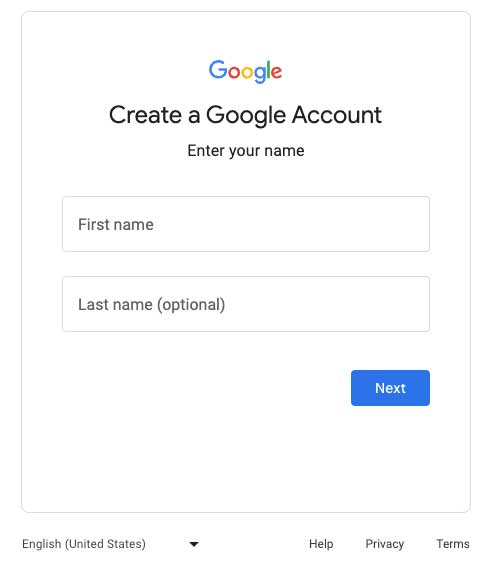
This will allow you to both create a YouTube channel, and also get paid further down the line if you monetise your channel.
Once you’ve set up an account, you can sign in on YouTube.com in the top right corner.

Once you’ve signed in, then you can click on your profile again in the top right and create your YouTube channel.
It’ll ask you to upload a picture and choose a channel name.
You’ll have to decide what these are going to be, but don’t shy away from using your own name and a picture of your face. Channels based around individuals often do better than ones based around brands. Audiences like following other people.
Then click create channel.
That’s it. You’re now officially a YouTuber. Let’s not wait until we start posting videos to embrace that identity, let’s believe it from today onwards. You are a YouTuber!
One final thing you’ll need to do is verify your phone number to be able to post videos longer than 15 minutes, upload custom thumbnails, live stream, and appeal Content ID claims.
You can do that in the settings in YouTube studio.
To summarise these steps:
- Create a Google account (unless you have one already).
- Go to YouTube and sign in.
- Click “Create a Channel” in the top right.
- Choose a channel name and upload a profile picture.
- Verify your account with your phone number.
How to Make Your YouTube Channel Look Professional
Now we have a channel 🥳 Let’s make it look a little more legit before we post any videos.
There are two things we need to do:
1. Make a channel banner
2. Write a description for the channel
You can come back to these after you’ve figured out exactly what your channel is going to be about, but let’s tick the box now in the simplest way.
You can use Canva to create a channel banner. They have a template for channel banners which you can check out here.
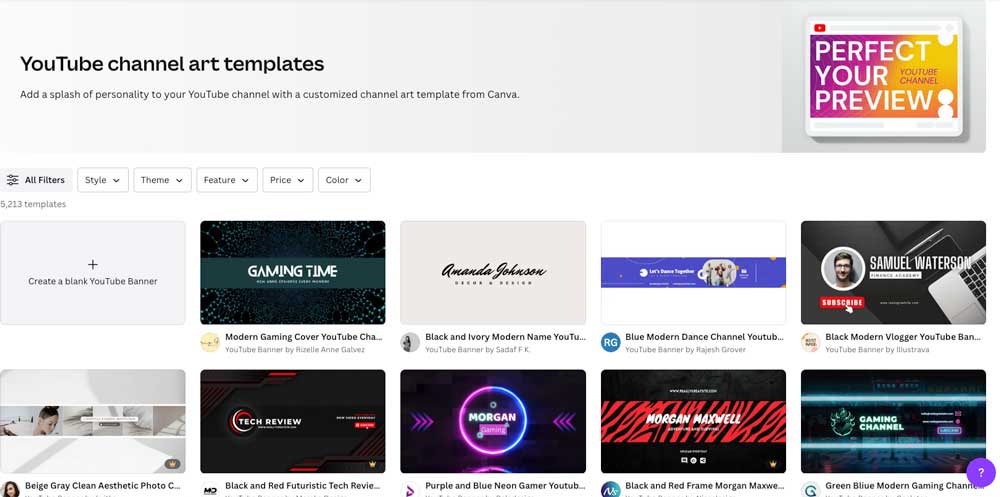
Then you can choose one of the templates, and edit it to fit your style. It’s important not to overthink this stage, and just make something that works. I recommend just repeating the channel name with a nice font in the banner, and some colours that match your channel vibe too.
Then you’ll need to download it, and go to the customisation tab in YouTube studio. Click on branding and upload the banner.
Now for the description. Again, it’s important not to overthink this, you can always come back and update it once you have a clearer idea of what your channel is about. Let’s just get something simple on the page. I’d introduce the channel and share a quick explainer of what they can expect from you. That’s it, remember you can always come back to this and change it later.
If you’re struggling to come up with something, you could copy and paste this below and alter it to fit your channel:
“Hey there 👋 My name is X, and on this channel I talk about Y. I love connecting with my viewers so let me know who you are and what you’d like to see in the comments on my next video!”
Nice and simple.
What Equipment You’ll Need
Equipment. This is potentially a huge rabbit hole, but you probably have everything you need to get started.
To make good YouTube videos, you need:
- A camera
- A microphone
- Nice lighting
That’s it.
Your phone has the first two, and natural light can be enough for the third. So you can just get started with your phone.
You can also use an app like [Filmic Pro](https://www.filmicpro.com/) to manually control more of your phone’s camera settings and make the videos look more legit.
However, if I was to upgrade my equipment to get my videos looking and sounding more professional I would buy these, in this order:
- Microphone – Either the Rode VideoMicro (~$50) or the Rode Lavalier GO (~$50).
- Light – Godox SL-60W Video Light ($100) plus the Godox CS-85D Softbox (~$90)
- Camera – Sony A6500 (~$700)
Those are some more expensive items of course, so I’d be careful how you spend your money. If you’re looking for even more information on gear you can check out this page here.
How To Decide What Videos to Make for Your YouTube Channel
Ok, now comes the real stuff. Figuring out what your channel is going to be, and what’s going to make it stand out from the crowd.
This is important, because you can’t expect to upload whatever you want and blow up within a few months.
YouTube is difficult, and it takes time to master. We’ll go be going through these 4 steps:
- Figure out your niche
- Define your target viewer
- Understand your competitors
- Generate video ideas
Figure Out Your Niche
There are lots of ways of thinking about this, so it’s best not to overcomplicate it (as always when it comes to starting on YouTube 😅).
Try to fill out the phrase “I make videos about X for Y.” Here are some potential options:
“I make videos about cooking for people with full time jobs”
“I make videos about gaming for teenagers”
Sometimes, this doesn’t quite fit, so you could try “I make X videos for Y” which could be “I make yoga videos for beginners”. Or maybe you could try “I help X do Y” like “I help students study for their exams.”
These are all totally legit ways of describing your channel and clarifying your niche. Here are some more suggestions for your niche on YouTube.
- “I make make-up tutorials for students at university”
- “I make videos about personal finance for people aged over 50”
- “I make freestyle rap videos for aspiring freestyle rappers under 30”
- “I make videos about Microsoft Excel for students and professionals”
- “I make workout videos for full time parents”
These all help clarify a very important point. What is the point in your channel? Who are you making videos for?
It’s ok if they are for a broad audience, but with educational channels in particular it’s good to have a target audience in mind.
Define Your Channels Target Audience
Next we want to define this target audience. Doing this can help you understand your channel value proposition better. That will help you with generating video ideas and making the right type of content for your audience.
Have a think about these kind of questions:
- What stage of life are they at?
- What’s their gender?
- Where do they live?
- What stresses them out?
- What are their hobbies?
- How much money do they make?
- What excites them?
- How old are they?
- What do they really want in life?
So now you’re hopefully making some progress in understanding what kind of videos you want to make, and who you’re making them for.
Complete a Competitor Analysis
The final thing we need to do, to understand our channel and audience, is analyse our competitors.
If we can understand who all the other channels are in this niche, and what they’re doing to succeed, it might give us some clues about what videos we should make (or not to make).
It also gives us some clues about the audience and what they really want from all the videos in this niche.
And it’s not that we want to actually compete with these channels, but it’s that analysing them can help us get a clearer picture of what we might need to do to succeed on YouTube.
To find them, you just have to search on YouTube for channels in your niche. It’s not a complicated process, just type in the video ideas that you have for your channel, or the things that you think your viewers might search, and see what comes up.
So try to come up with a list of at least 5 channels in your niche who are making the same kind of videos that you might want to make, or that are at least making videos for a similar audience to you.
Then answer these questions for each channel:
- Which topics perform well for them?
- What is their title and thumbnail style?
- What is their typical video format? (e.g. talking head, vlog, documentary style etc)
- What things do they do that you want to take inspiration from?
- What things do they do that you want to avoid?
If you answer those questions for around 5 channels, you’ll be in a great position for the next step.
Generate Video Ideas
Now, you hopefully have a really clear picture of what kind of videos you want to make, and the state of play in your niche on YouTube. You’re in a great position to generate some specific video ideas/titles.
You need to have a bunch of potential videos that you’re excited to make to get you going. It’s important to not get too fixated on making something really useful to your entire audience, just try making something that you think could be useful to one person.
Doing this will help you get even clearer on what your channel will be about, but it will also give you some momentum after you’ve made your first video so you don’t have to figure out what to make next.
Try to generate 20+ video titles that you think a) you’d be interested in making and b) one person in your target audience would potentially be interested in watching. These could be trend based, things that are working for your competitors, or your own unique ideas. Just get a list of ideas down.
How to Make Your First YouTube Video
Here we go.
You’ve got a list of ideas, and you’ve got your channel set up. Now let’s start making a video.
For your first 3 videos, the best thing you can do is just pick up your camera, speak from the heart and post it.
That will really help you overcome the barrier of making videos and get moving. But once you’re past that hurdle, then you can start to improve things a bit.
Depending on your niche and format, you’ll have a few different options, but ultimately posting a video comes down to 5 stages.
- Planning and writing
- Titles and thumbnails
- Filming
- Editing
- Posting
Every channel is different, and you’ll have a much clearer vision than I can articulate here, but you still need to go through those stages to some extent.
Planning & Writing for Your Channel
Planning your video can just be as simple as a few bullet points of what you want to say or things you want to remember. You don’t want to overthink it at this stage, because otherwise you won’t end up doing anything.
For now, I’d try to pick some topics that you can talk more easily about which don’t require much preparation. Things that you could talk to a friend or stranger about super comfortably.
Then write down a few bullet points to keep you on track throughout the video.
Titles & Thumbnails
Some people suggest making your titles and thumbnails as the first part of your process, which is great to do down the line, but for now let’s keep it simple and focus on momentum.
You don’t have to have a perfect title or finalised thumbnail before filming, but it’s great to have an idea of what they could be before you do actually press record.
For titles, the best way to think about it is to accurately describe your content, but in a way that leaves the viewer wanting to know more.
The simplest way to get started is to copy other channels in your niche, and over time you’ll build more confidence and understanding.
Again, try not to overthink it. You’re totally allowed to take inspiration from other channels and niches on YouTube, the most important thing is that it aligns with the content you’re making.
For thumbnails, I’d recommend using Canva. It’s very easy to learn and much more beginner friendly than Photoshop.
Here are some simple things to focus on when making thumbnails:
- Present 1 idea to the audience, not 3-4. Keep them simple.
- Focus on the psychology of the thumbnail, not just the design. What’s going to make a viewer click?
- Use text if it makes sense, but avoid more than 4 words on a thumbnail.
- Use faces where possible. As humans we are drawn to other faces.
- Use contrasting colours. Use the Canva colour wheel to help with this.
Filming
This is going to look a bit different depending on what kind of videos you’re making, but let’s assume you’re doing educational talking head videos for now.
Being comfortable on camera is a steep learning curve, and does not come naturally to most people so don’t worry if you feel awkward to begin with. Be kind to yourself.
It can help to play some music beforehand and get in the zone, but then when it comes to actually being in front of the camera, try to be as authentic as possible.
One really helpful tip I find is to assume the audience are super interested and focused on what you have to say. They’re here to listen to YOU and find your information super helpful.
But ultimately, the main thing is just to practice, practice, practice. There are no shortcuts to improving your camera presence other than finding your groove over time. If you’d like more help with speaking to a camera, you can check Ali’s free Camera Confidence practice plan here.
A few other tips for filming:
- Check for background noise before you press record.
- Make sure you have memory space on your camera SD card/phone.
- Double-check that your phone/camera and microphone have a charged battery.
- Make sure your phone/camera is focused properly.
- Relax 🙂 you can always cut out mistakes in the edit.
Editing
Now you’ve filmed something, you need to edit it.
As a beginner, iMovie or Capcut are quite good, but generally most pro YouTubers would use Adobe Premiere Pro these days.
Ali used Final Cut Pro when he was editing, and has a whole course on that here, but it’s not being updated as much these days compared to other software.
There are 3 stages to most kinds of YouTube editing:
- The A-Cut – this is chopping up the raw footage to trim out silences and cut the best takes together.
- Adding B-Roll – these are other videos that you can overlay on top of the original footage to convey the message better and make the video more interesting.
- Other Stuff – Adding in things like text, graphics, images, title screens, background music, sound effects, transitions, or animations..
By far the most important thing to get right with an edit though is a tight and clean a-cut. If that’s not smooth or feels off, it’s very hard to watch.
How to Post Your First YouTube Video
We’re almost there!
Remember, at the start, momentum and action are much more important than making good videos. So if you’re a complete beginner, and feeling a bit underwhelmed with your first video, don’t worry, it might take a few months for your videos to start looking and sounding the way you want them to.
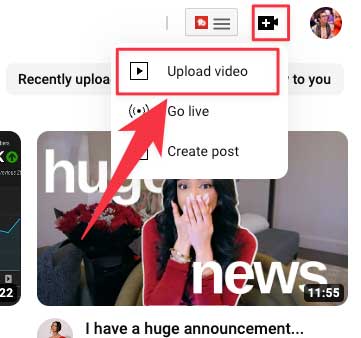
Now we need to upload and post it to YouTube.
Go into YouTube studio on your channel, click on this button, choose upload video and then upload the file.
There are lots of settings that you can play around with when you upload, but the main things to remember are:
- Write a description of your video. This can help YouTube understand what the video is about and also engage viewers.
- Share links to anything you mentioned in video.
- Write timestamps.
- Link cards during the video to any other videos you mentioned.
- Select an end screen (this is the thing that appears right at the end of the video).
And that’s it. Congrats on posting your first video and starting your YouTube Channel.
Extra Tips & Resources
Here are a few more resources that might help you out: