
When starting a YouTube channel many of us think we need a ton of fancy gear and a super expensive camera before we begin filming. But, in reality, this isn’t necessary.
If you’re on a budget or just want to give this YouTube thing a go, all you really need to get started is the camera on your phone. This gives you pretty decent video/audio quality and is more than enough to build an audience. Any extra gear is just a bonus.
But even when you’re using your phone camera, there are still a few important things you need to keep in mind if you’re looking to create the best possible videos:
- Video quality
- Audio quality
- Lighting
- Framing
- Additional Equipment
📹 Video Quality
This is the most important thing. And, unfortunately, we don’t really get the best video quality with the default camera app on our phone.
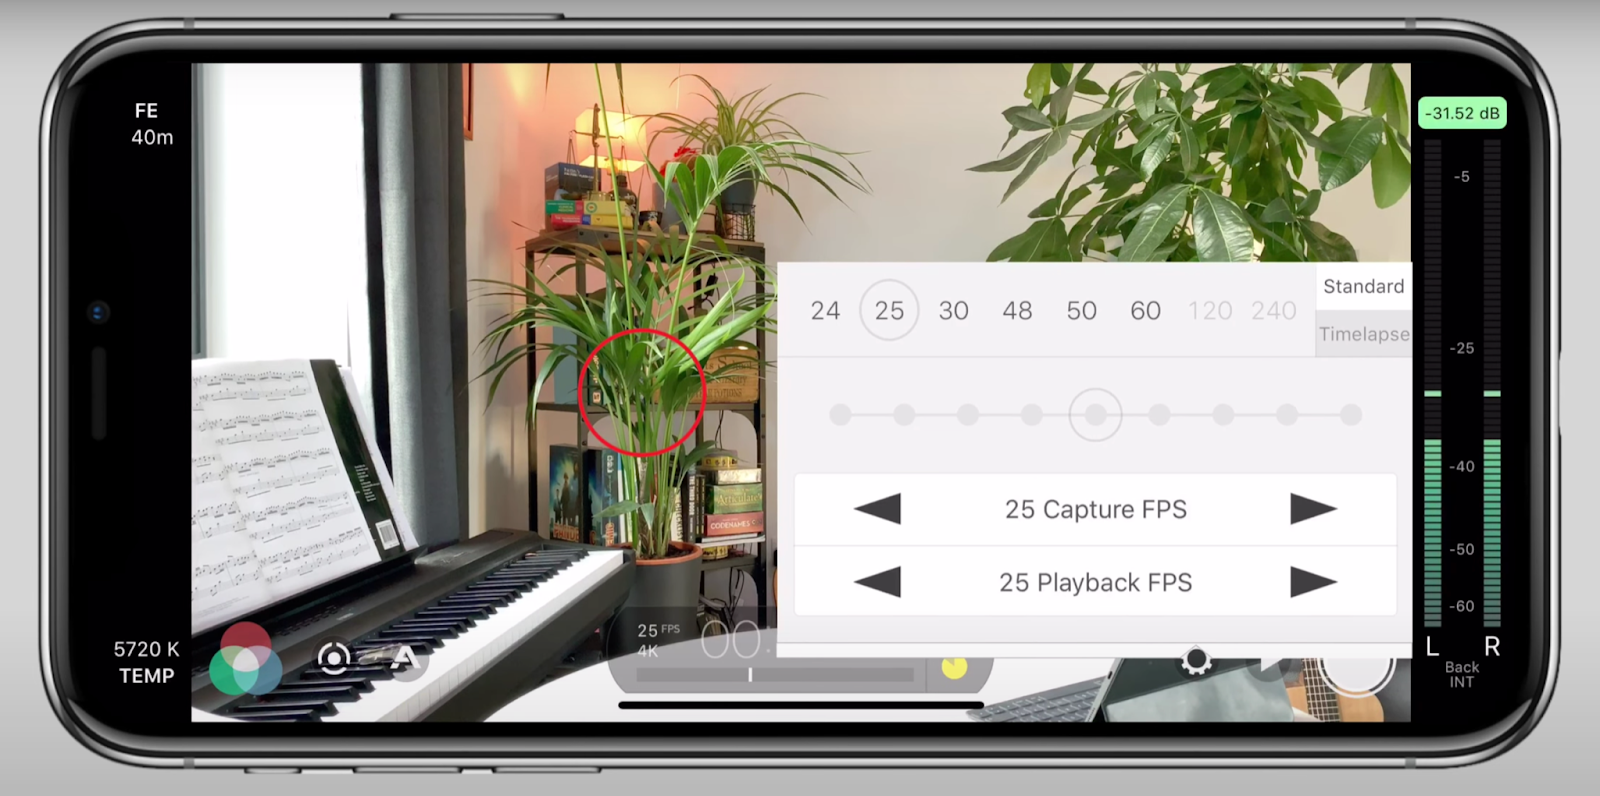
So, the app that you want to use and that most people recommend to sort this out is called Filmic Pro. The great thing about this app is that you can manually control a lot of the camera settings, which really helps to boost the visual appeal of your videos.
In particular, you need to change the following settings:
1. Frame rate – normally iPhones film in 30 frames per second (FPS). This is just a little bit too smooth and isn’t really the vibe you usually want to be going for (unless you like it, in which case you do you). I normally shoot in a frame rate of 25 FPS, which looks far more cinematic. And hopefully looks quite reasonable when using your phone too.
2. Resolution and Bitrate – this sounds complicated but basically you want to film in 4K resolution, because you might as well and most modern phones offer that. And then you want to crank up the bitrate as high as possible too. On iPhones this is called ‘FiLMiC Extreme’ and on Android I think it may say something like ‘100 Mbps’. This just means there’s more information encoded and takes up a bigger file size, which generally means your videos are going to be higher quality.

3. White balance – you want to set your white balance so it doesn’t vary massively.

4. Shutter speed – finally, there’s this kind of rule with filmmaking that if your frame rate is 25 FPS you want your shutter speed to be double that. So you want your shutter speed to be 1/50 of a second. Essentially, that gives you the best amount of cinematic motion blur, which should hopefully make the video look fairly natural when you’re moving your hands as you talk. If you cranked up the shutter speed really high (like 1/200), it would look a lot more choppy.

This all sounds complicated, but once you’ve got the settings sorted the first time, you can save them as a preset on Filmic Pro and never have to touch them again. There’s a load of other tutorials on YouTube if this sort of stuff interests you and want to go into more depth. But the most important thing for decent video quality is not using the default camera app and using something like Filmic Pro.
🎤 Audio Quality
Some people say that audio is even more important than video quality. This is because people will happily sit through a low quality video if the audio is good, but nobody will want to watch your video if the audio is poor. So, even as a beginner, you need to at least think about your audio quality.
If you’re just getting started with YouTube, the audio with just your phone isn’t actually too bad. It definitely isn’t the sort of quality where people would be like “oh god, that’s garbage, I’m going to turn this off immediately”.
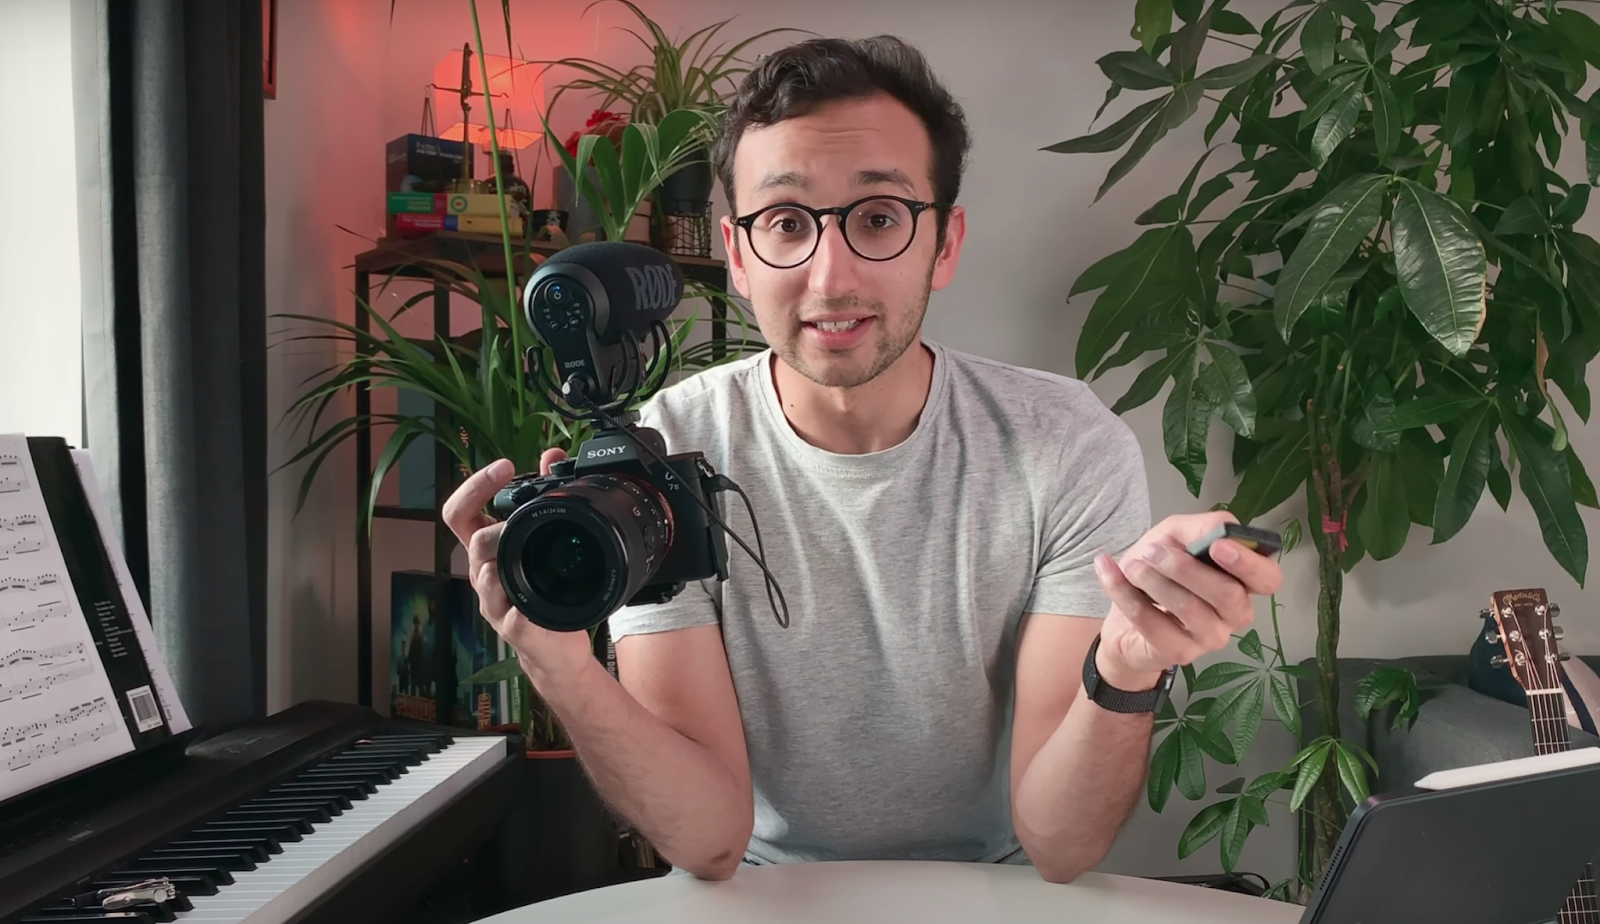
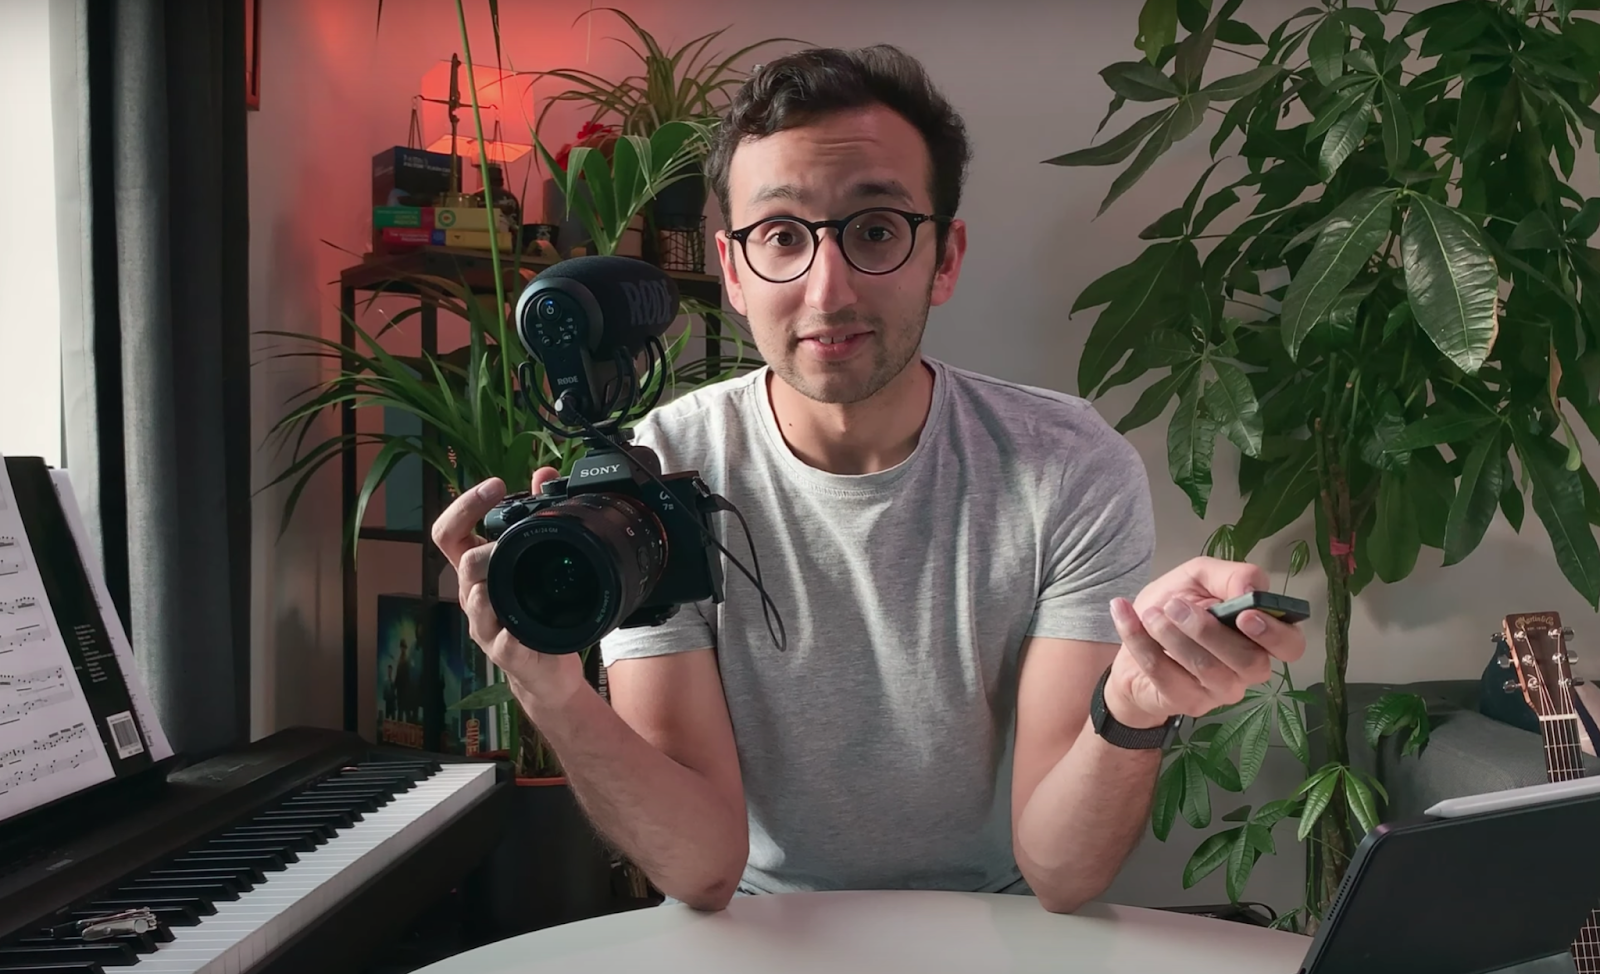
But if you’re looking for something a little better, using a small microphone like the Rode VideoMicro is a good option. This will set you back about $50 from Amazon. Then you just connect it to your phone using a Rode adapter, which costs about $10.
Here’s the difference in audio quality between the iPhone’s microphone and the Rode VideoMicro:
Hopefully you can see that the Rode VideoMicro sounds a little bit better than the default iPhone microphone. It’s a good option if you’re on a budget and want an easy way to level up your videos.
💡 Lighting
Even if you don’t have the money to spend on a full lighting setup, you can just sit next to a window and this will give you some pretty decent lighting. In fact, using my fancy Aputure 120Dii light doesn’t actually make that much difference to the video when compared with sitting next to a good source of natural light:
If you watched my behind the scenes videos or a video from Peter McKinnon about how to light your videos, it can be quite intimidating seeing these huge, expensive, light domes and stuff. But you really don’t need that to get started. Sure, over time, it’s definitely worth investing in a light. And I’m really glad I spent the $100 for my lighting setup. But as a beginner you can get pretty decent results sitting next to a window.
🖼 Framing
“Framing the shot” means getting yourself and your background positioned perfectly, so there’s a nice visual feel to your videos.
When I record with my iPhone, I normally connect it to my MacBook and use QuickTime Player to share/mirror whatever my phone’s recording. As I normally use the normal camera on the back of my phone (as they offer slightly higher quality than the selfie camera), this helps me to easily frame my shot and see exactly what I’m recording.
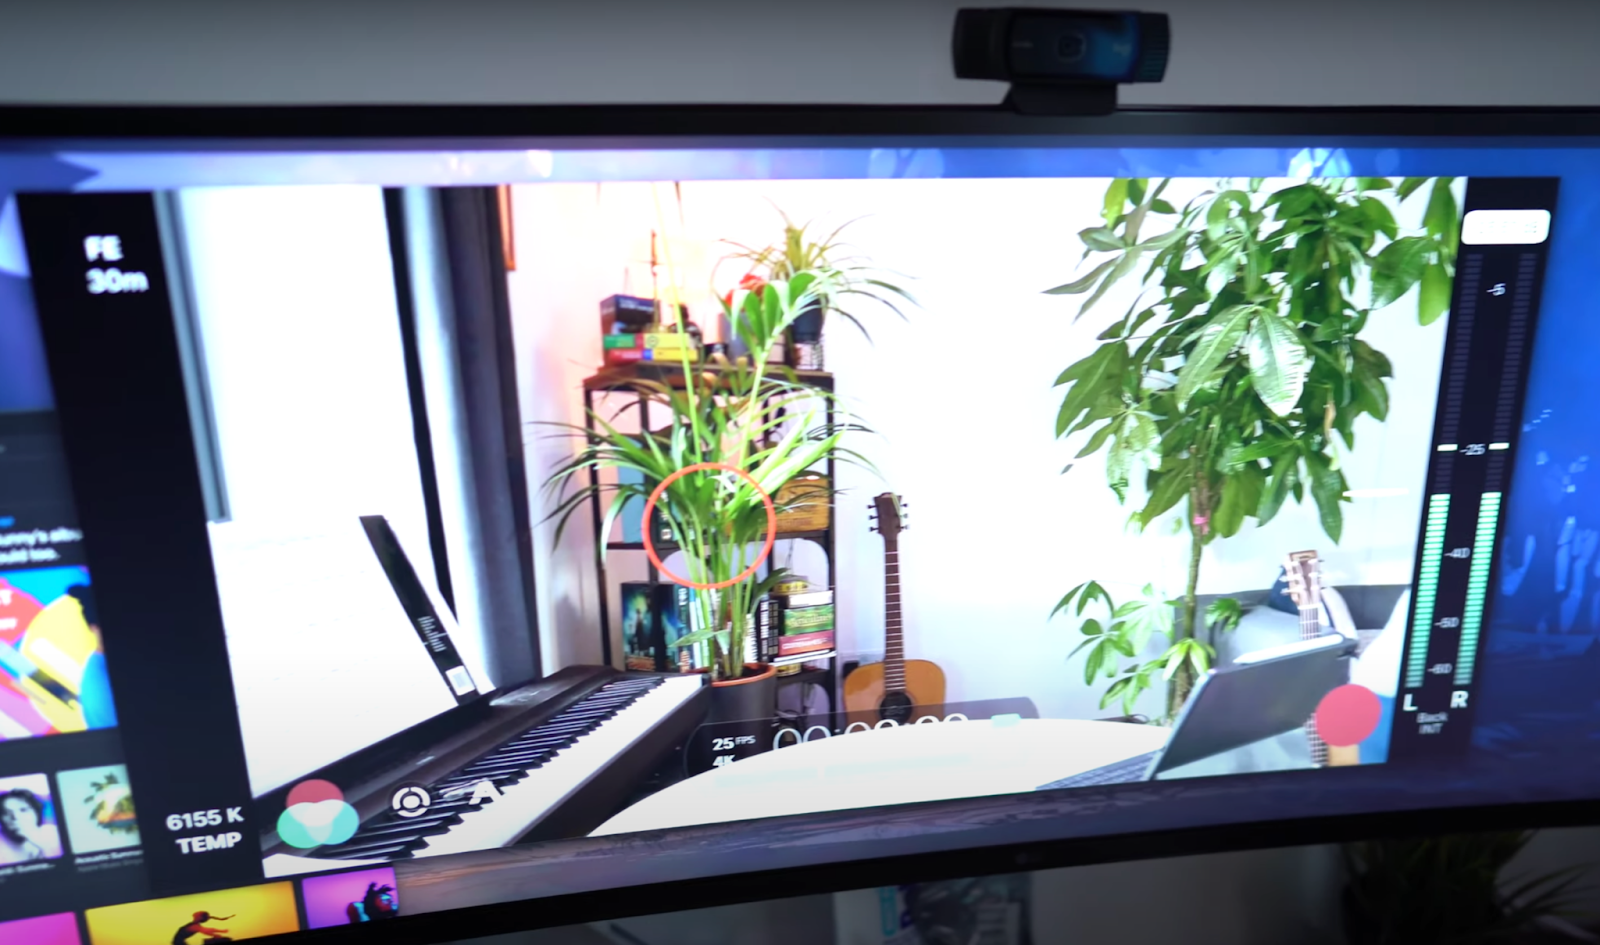
That way I also don’t need a fancy monitor, like the SmallHD Focus that I bought for $600. Using QuickTime Player basically does the exact same thing.
🛠 Additional Equipment
Finally, there’s a couple of extra things you can use to make our videos look fantastic:
- Extra lenses – if you want to go for a slightly different look than the standard framing of your phone, you can use an external lens that just screws on top of it. I quite like the extra wide angle iPhone lenses from SANDMARC. I’m not a huge fan of being far from the camera, this wider framing means I can sit a little closer. This helps improve my audio quality too (as I’m also closer to my microphone).
- Tripod – I just use a random phone tripod. It really doesn’t matter what you use. The important point is that you can put a cold shoe mount on top, which means you can easily attach your Rode VideoMicro on top when you choose to upgrade your audio. If you’re really ghetto, and you don’t want to spend the money on a tripod, you could prop up your phone on a stack of textbooks instead. That way, there’s never an excuse as to why you’re not getting started on YouTube.
If you're interested in getting started on YouTube, you might want to check out my free YouTube crash course. I'll teach you all the basics to get your channel off the ground.
👍🏻Conclusion
The main point is that you don’t actually need a lot to start a YouTube channel and begin filming. If you’re on a budget you can do everything on your phone. Then upgrade later when you decide to start taking things a bit more seriously.
Buying more expensive gear is just one way of stacking the deck in your favour, giving you the best shot at success on YouTube. It isn’t essential to start. Feel free to check out the gear I use on my channel if this sort of thing interests you.
Another brilliant way of stacking the deck in your favour is to join a live cohort, where you can learn the systems, strategies, and tools that helped other YouTubers to succeed. If this sounds like fun, I run a Part-Time YouTuber Academy where I teach people how to create systems to grow their channel from 0 to 100,000+ subscribers and transform it into a sustainable, income-generating machine.
And if you’re interested in learning more about YouTube and getting started, check out my Ultimate Guide to YouTube.
I don’t know why I’m the first to comment, but I’m happy to be the first! Great info. I appreciate it!